How To Access Your Raspberry Pi Via SSH Behind A Firewall On Windows 10
Listen up, tech enthusiasts and Raspberry Pi fans! If you're scratching your head trying to figure out how to access your Raspberry Pi via SSH behind a firewall on Windows 10, you're in the right place. This guide is packed with step-by-step instructions, practical tips, and expert advice to help you conquer this challenge. Whether you're a beginner or a seasoned pro, we've got you covered. So grab your favorite beverage, and let's dive in!
SSH (Secure Shell) is one of the most powerful tools for remote management, but things can get tricky when firewalls come into play. If your Raspberry Pi is tucked away behind a firewall, don't panic. With the right setup and a bit of know-how, you can still connect to it securely from your Windows 10 machine. This article will walk you through everything you need to know.
In today's world, remote access is essential for managing devices like the Raspberry Pi. Whether you're tinkering with home automation projects or running servers, being able to connect to your Pi from anywhere is a game-changer. But before we get into the nitty-gritty, let's break down the basics and set the stage for success.
- Revolutionizing Spaces Exploring Interior Design By Kdarchitects Morph
- Juan Pablo Di Pace Daughter The Rising Star In Her Own Right
Understanding SSH and Its Importance
First things first, what exactly is SSH? Think of it as a secure tunnel that lets you communicate with your Raspberry Pi from a distance. It encrypts your data, ensuring no one can snoop on your activities. For anyone working with IoT devices or servers, SSH is indispensable. But here's the catch—if your Raspberry Pi is behind a firewall, you'll need to jump through a few hoops to make the connection work.
Why Firewalls Make Things Complicated
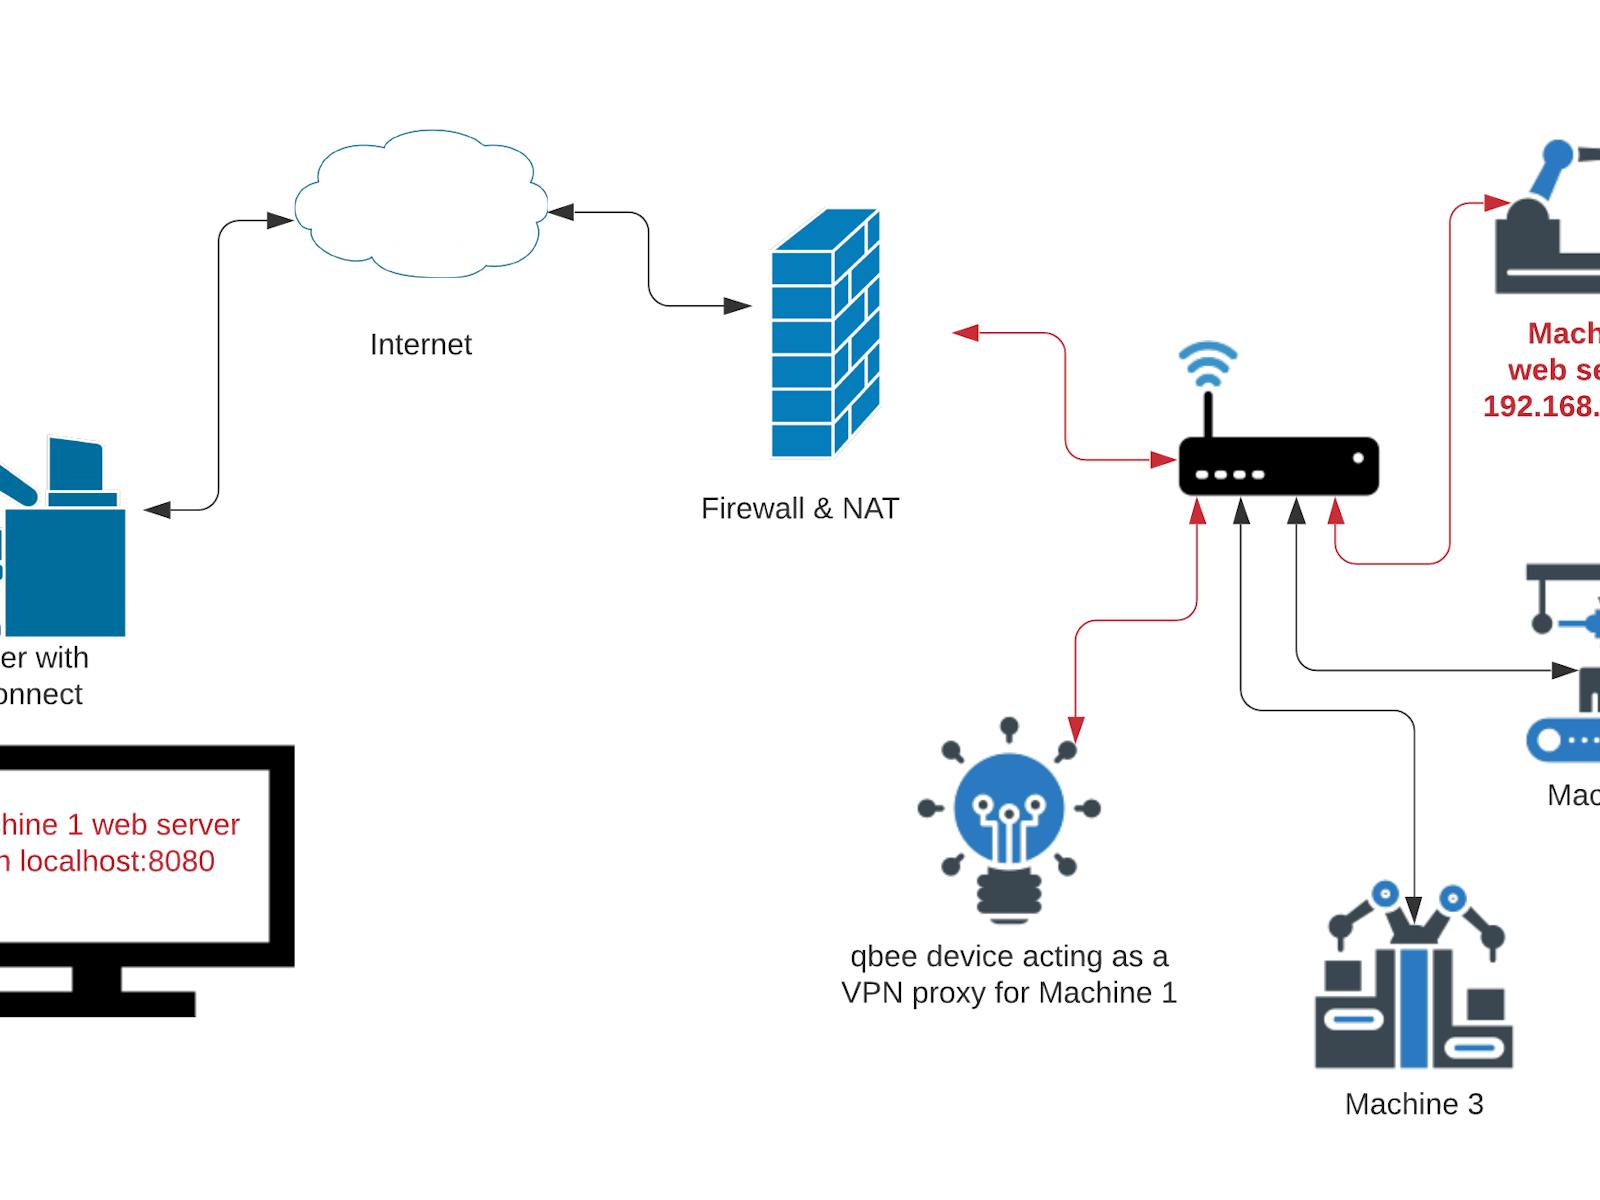
Firewalls are like bouncers at a club—they decide who gets in and who stays out. While they're great for security, they can block your SSH attempts if not configured properly. If your Raspberry Pi is on a network with a firewall, you'll need to tweak some settings to allow SSH traffic. Don't worry; we'll guide you through this process so you can bypass these barriers without compromising security.
What You’ll Need to Get Started
Before we dive into the steps, make sure you have the following:
- Alicia Menendez Msnbc Husband The Inside Scoop On Love Career And Life
- Why Kdarchistyle Is Revolutionizing Modern Architecture
- A Raspberry Pi with SSH enabled
- A Windows 10 computer
- Access to your router's settings
- A basic understanding of networking concepts
Having these tools and knowledge will make the process smoother and more efficient. Now, let's move on to the fun part!
Step 1: Enable SSH on Your Raspberry Pi
To access your Raspberry Pi via SSH, you need to ensure SSH is enabled. Here's how you can do it:
- Boot up your Raspberry Pi and log in.
- Open the terminal and type
sudo raspi-config. - Navigate to the "Interfacing Options" menu.
- Select "SSH" and choose "Yes" to enable it.
- Reboot your Raspberry Pi to apply the changes.
That's it! Your Raspberry Pi is now ready to accept SSH connections. Next, we'll tackle the firewall issue.
Step 2: Find Your Raspberry Pi’s IP Address
Knowing your Raspberry Pi's IP address is crucial for setting up remote access. Here's how you can find it:
- Open the terminal on your Raspberry Pi.
- Type
hostname -Iand hit Enter. - You'll see the IP address displayed on the screen.
Take note of this IP address because you'll need it later when configuring your router and firewall settings.
What If You Have a Dynamic IP Address?
Some networks assign dynamic IP addresses, which can change over time. To avoid issues, consider setting a static IP address for your Raspberry Pi. This ensures that your device always has the same address, making it easier to connect remotely.
Step 3: Configure Your Router for Port Forwarding
Now comes the tricky part—configuring your router to allow SSH traffic. Here's what you need to do:
- Log in to your router's admin interface using a web browser.
- Look for the "Port Forwarding" or "NAT" settings.
- Add a new rule to forward port 22 (the default SSH port) to your Raspberry Pi's IP address.
- Save the changes and restart your router if necessary.
Once this is done, your router will direct incoming SSH requests to your Raspberry Pi, even if it's behind a firewall.
Step 4: Test the Connection Locally
Before moving on to external connections, test your setup locally to ensure everything works as expected. Here's how:
- Open the terminal on your Windows 10 machine.
- Type
ssh pi@and hit Enter. - Enter the Raspberry Pi's password when prompted.
If you can successfully connect, congratulations! You've completed the local setup. Now let's take it to the next level.
Step 5: Access Your Raspberry Pi from Outside the Network
To access your Raspberry Pi from outside your local network, you'll need to know your public IP address. Here's how:
- Visit a website like WhatIsMyIP.com to find your public IP address.
- Use this address to connect via SSH from any device with an internet connection.
For example, you can type ssh pi@ in the terminal of another computer to connect to your Raspberry Pi.
Dealing with Dynamic Public IPs
Public IP addresses can change periodically, which might disrupt your remote access. To solve this, consider using a Dynamic DNS (DDNS) service. These services assign a static domain name to your changing IP address, ensuring you always have a reliable way to connect.
Step 6: Secure Your SSH Connection
Security should always be a top priority when setting up remote access. Here are some tips to keep your Raspberry Pi safe:
- Change the default SSH port (22) to a less common port number.
- Use strong passwords or SSH keys for authentication.
- Limit access to specific IP addresses if possible.
- Regularly update your Raspberry Pi's software to patch vulnerabilities.
By following these best practices, you can minimize the risk of unauthorized access.
Step 7: Troubleshooting Common Issues
Even with careful planning, things can go wrong. Here are some common issues and their solutions:
- Connection Refused: Double-check your router's port forwarding settings and ensure SSH is enabled on your Raspberry Pi.
- Timeout Errors: Verify your public IP address and ensure there are no firewalls blocking the connection.
- Authentication Failed: Confirm that you're using the correct username and password for your Raspberry Pi.
If you're still stuck, don't hesitate to reach out to online communities or forums for additional help.
Conclusion: Mastering Remote Access
Accessing your Raspberry Pi via SSH behind a firewall on Windows 10 might seem daunting at first, but with the right steps, it's entirely achievable. By enabling SSH, configuring your router, and securing your connection, you can manage your Pi from anywhere in the world. Remember, practice makes perfect, so don't be afraid to experiment and tweak your setup until it works flawlessly.
Now it's your turn! Try out these steps and let us know how it goes. If you have any questions or need further clarification, feel free to drop a comment below. And if you found this guide helpful, don't forget to share it with your fellow tech enthusiasts. Happy tinkering!
Table of Contents
- Understanding SSH and Its Importance
- Why Firewalls Make Things Complicated
- What You’ll Need to Get Started
- Step 1: Enable SSH on Your Raspberry Pi
- Step 2: Find Your Raspberry Pi’s IP Address
- What If You Have a Dynamic IP Address?
- Step 3: Configure Your Router for Port Forwarding
- Step 4: Test the Connection Locally
- Step 5: Access Your Raspberry Pi from Outside the Network
- Dealing with Dynamic Public IPs
- Step 6: Secure Your SSH Connection
- Step 7: Troubleshooting Common Issues
- Conclusion: Mastering Remote Access

Detail Author:
- Name : Mrs. Willa Boehm
- Username : holly.jacobs
- Email : herta.heathcote@yahoo.com
- Birthdate : 1983-09-29
- Address : 45343 Amara Cape Bartellstad, ME 33680-5876
- Phone : 1-541-290-3854
- Company : Bogisich and Sons
- Job : Petroleum Engineer
- Bio : Quas magni quaerat accusantium voluptas. Deserunt enim accusamus id voluptas dignissimos. Optio incidunt minus inventore ea eos ad sapiente. Qui non velit exercitationem quasi tempora.
Socials
twitter:
- url : https://twitter.com/derek.mcclure
- username : derek.mcclure
- bio : Nisi voluptatem tenetur consequatur sit voluptatem consequatur libero. Unde ut cumque harum dolor.
- followers : 754
- following : 2015
instagram:
- url : https://instagram.com/mcclured
- username : mcclured
- bio : Natus totam voluptatum quas quidem harum illo. Adipisci ut molestiae facilis laborum.
- followers : 2429
- following : 1106
facebook:
- url : https://facebook.com/derek8311
- username : derek8311
- bio : Omnis qui perferendis vel sed sint minima.
- followers : 4427
- following : 445
